Create A Workflow
Learn how to create a new workflow.
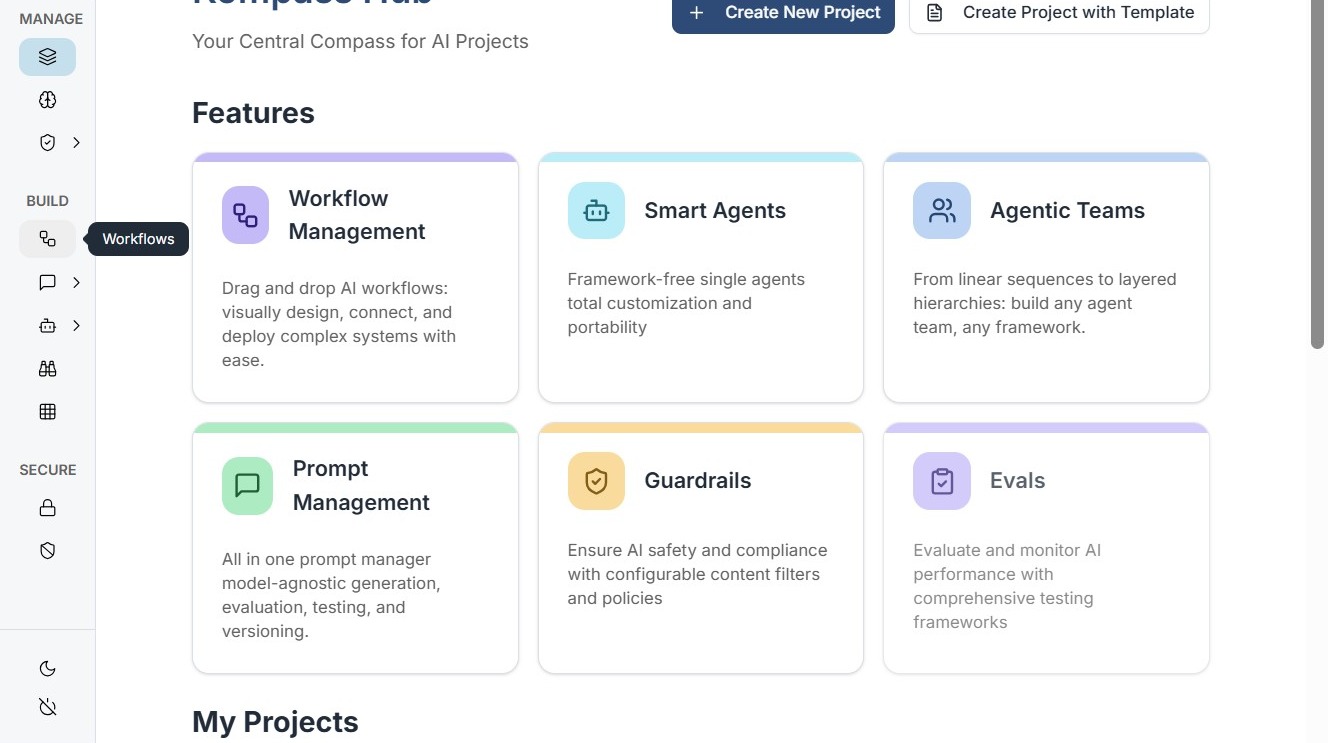
1. Navigate to Workflows
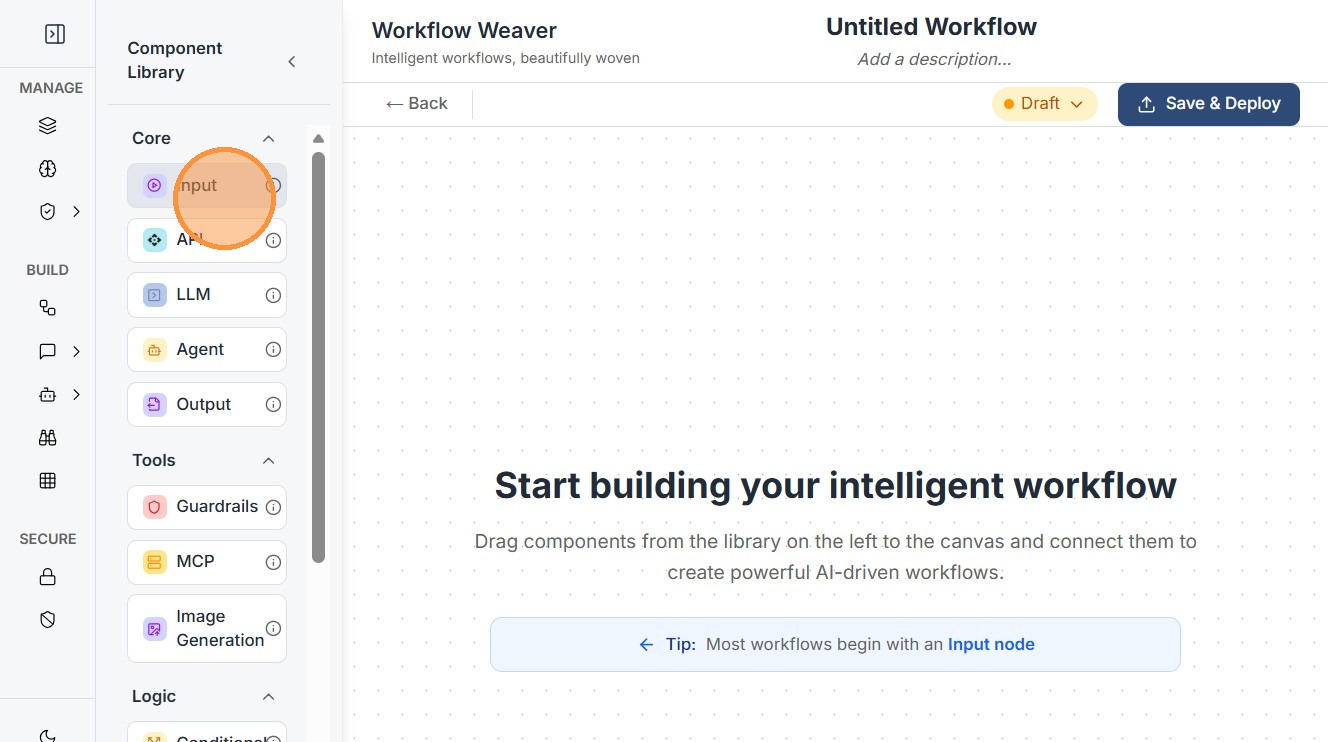
2. Initializing the Canvas
To begin, navigate to the Workflows icon on the sidebar and click "Create Workflow". This opens the Workflow Weaver—a visual canvas where logic is built using nodes.

Step-by-Step Node Configuration
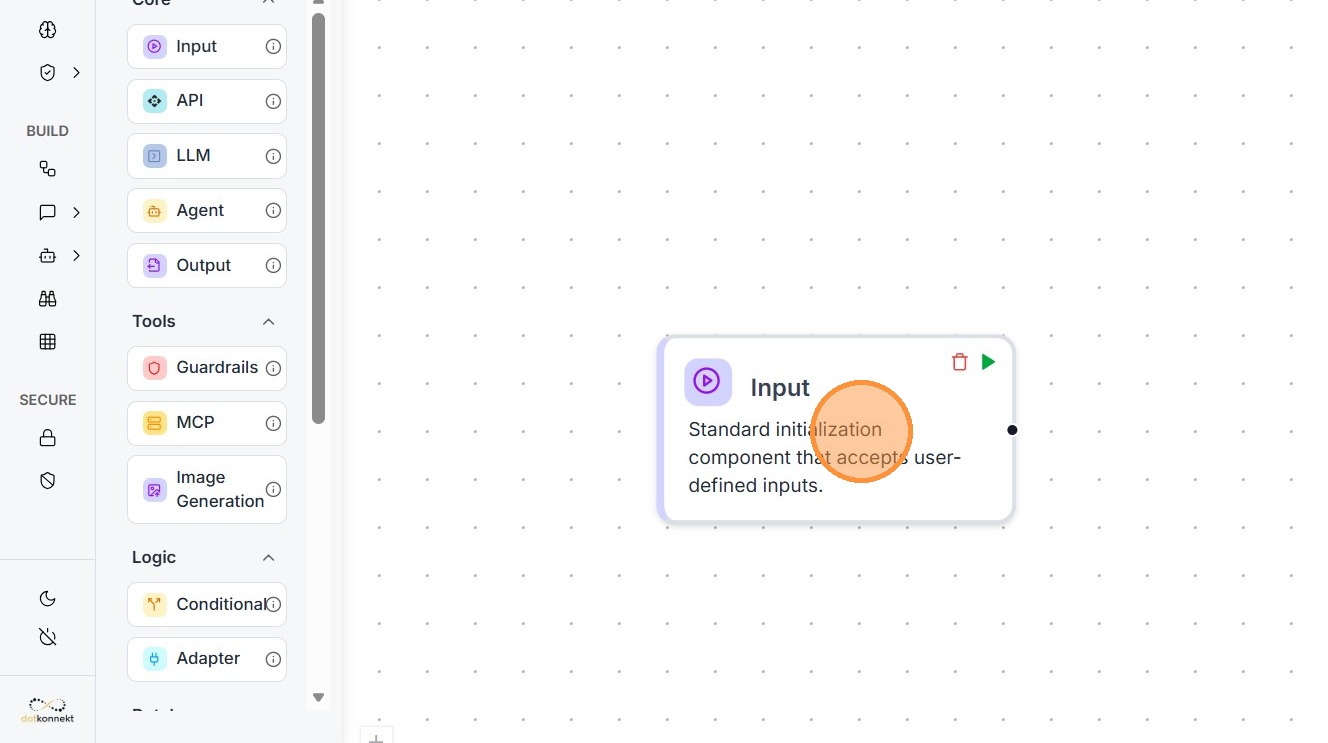
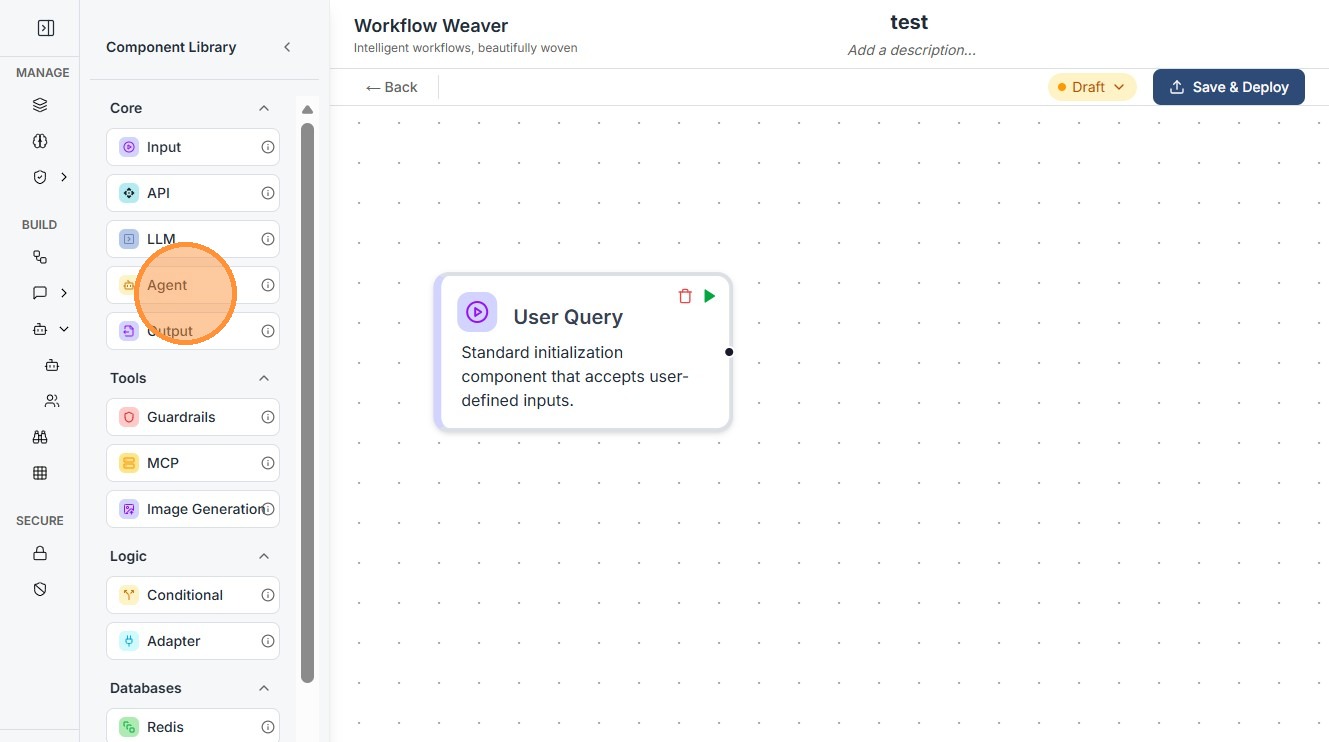
A. Adding the Input Component
Every workflow needs an entry point for data.
-
Action: Select the Input category from the node library.
-
Technical Detail: Choose the "User Query" component. This acts as a standard initialization node that accepts user-defined inputs (strings, JSON, etc.) from the frontend or API.
-
Setup: Give the input node a descriptive name and click Save.
Click component tile, this will open configuration window for that component.
Enter Name, output type and query.
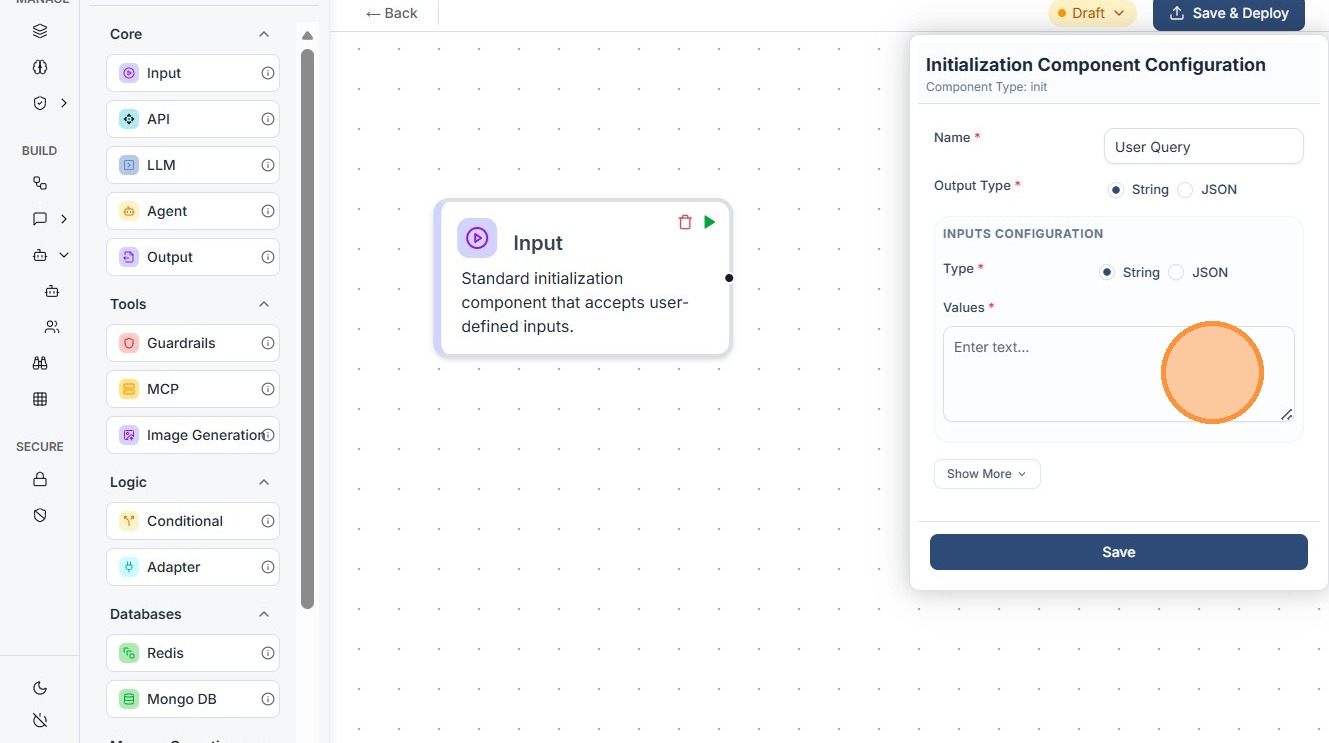
Click "Save"

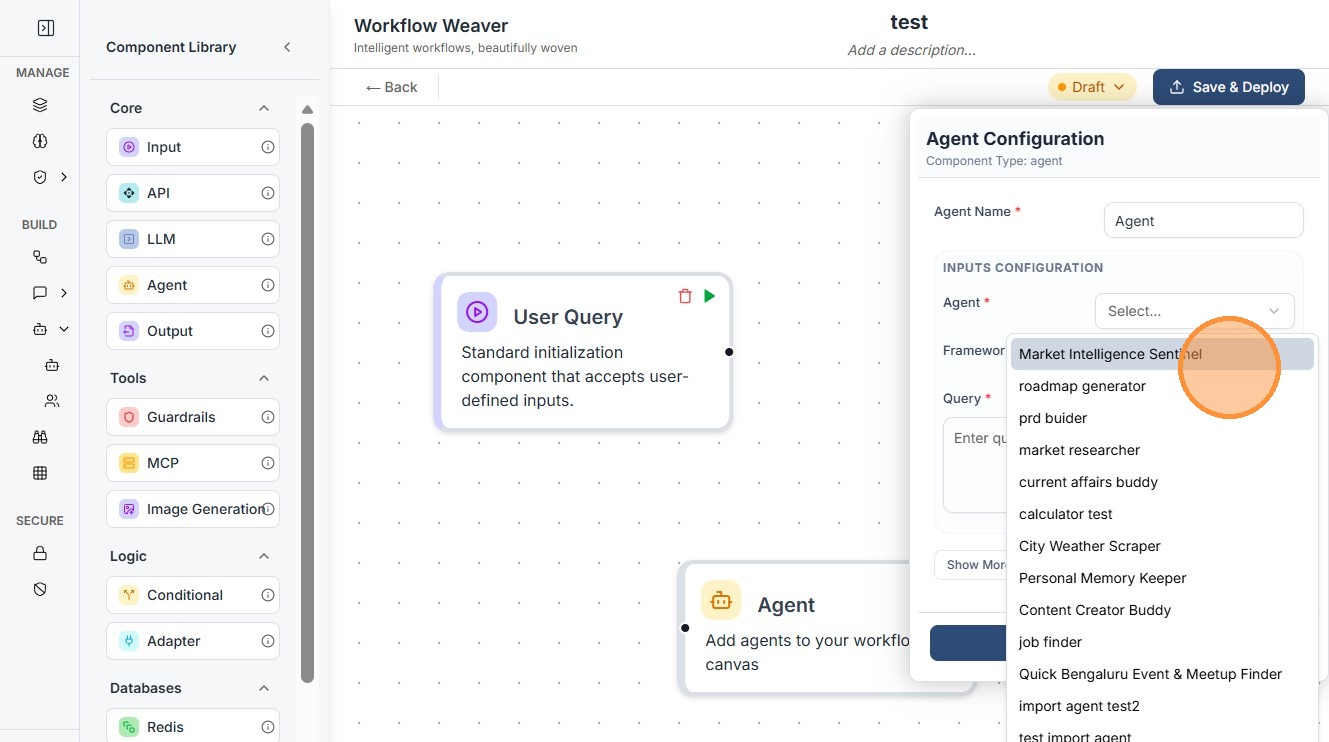
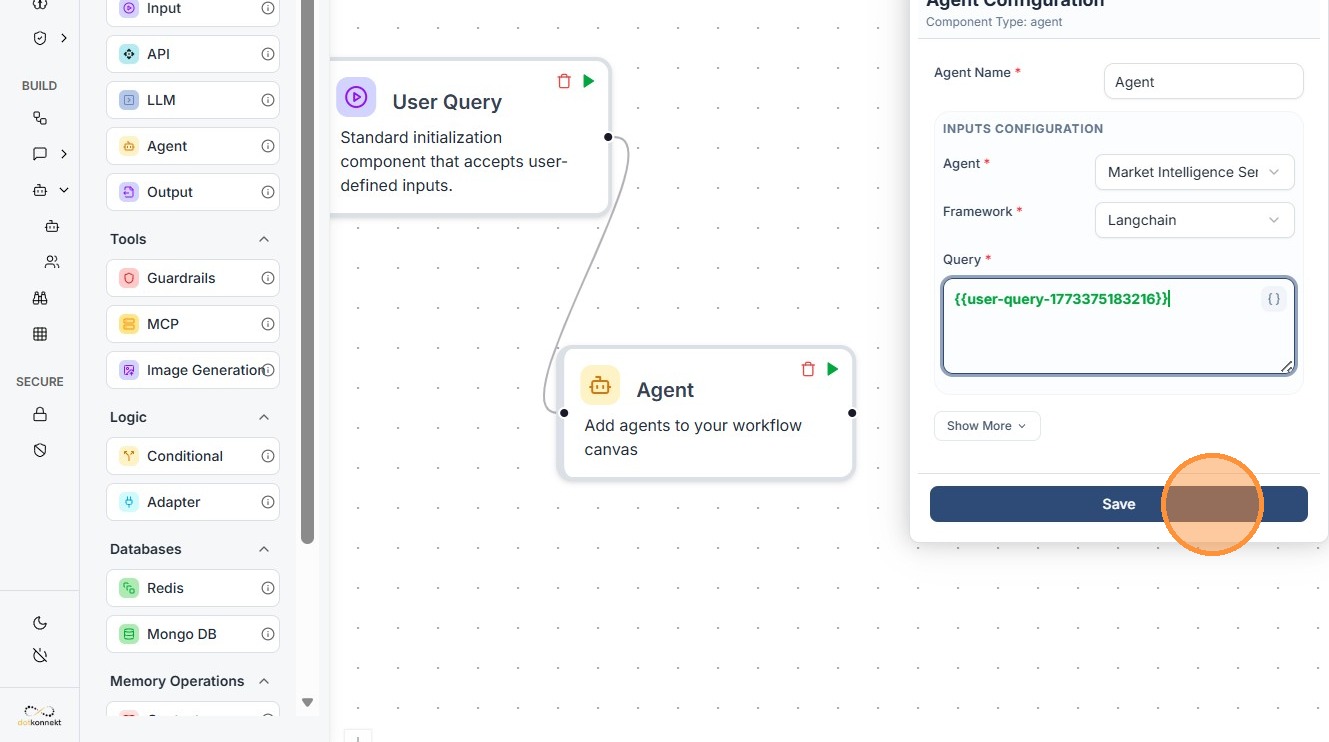
B. Deploying the Agent
The Agent is the "brain" that processes the input logic.
-
Action: Click the Agent category and add the "Agent" node to the canvas.
-
Technical Detail: In the configuration panel, you must select a pre-configured agent (e.g., "Market Intelligence Sentinel"). This links the node to the specific LLM settings, tools, and system prompts you defined in the Smart Agent builder.
Configure Agent for your workflow by providing Name,Click Agent You want in Your Workflow. Remember to make the agent's status "Active".
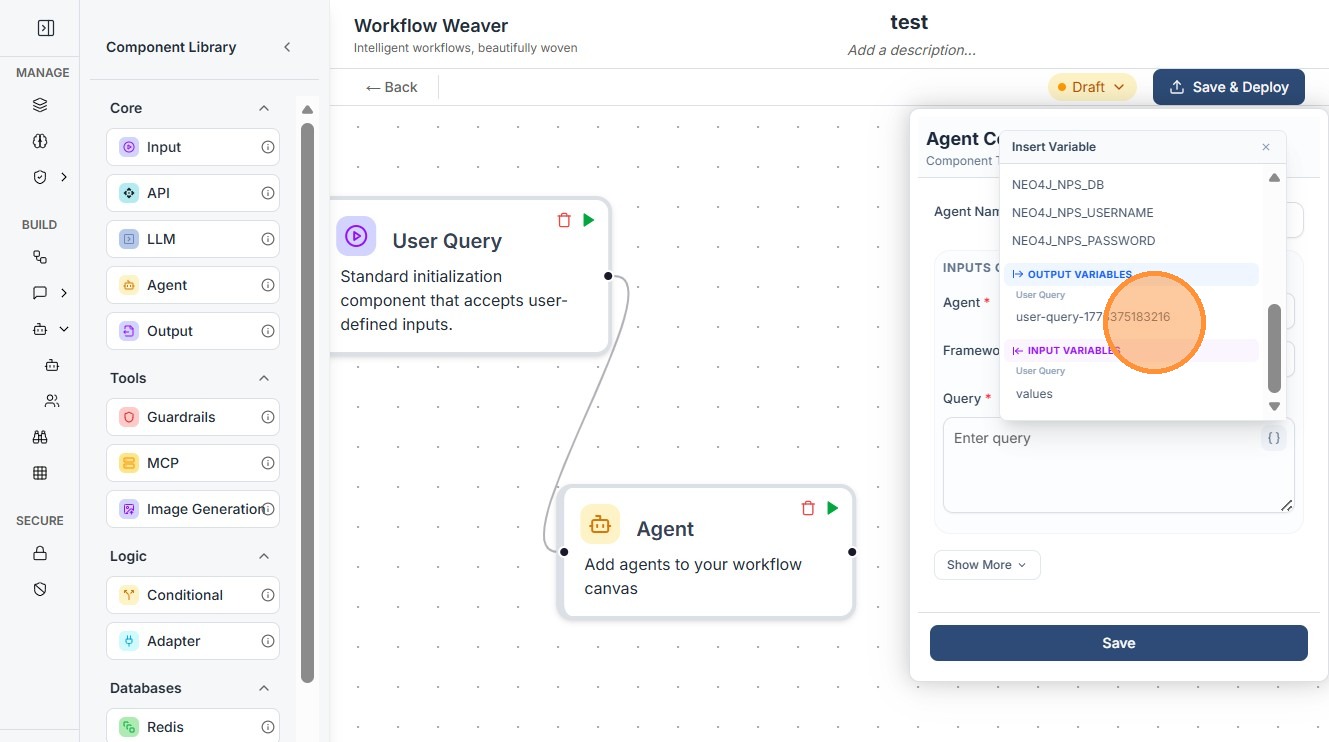
Connect the nodes.
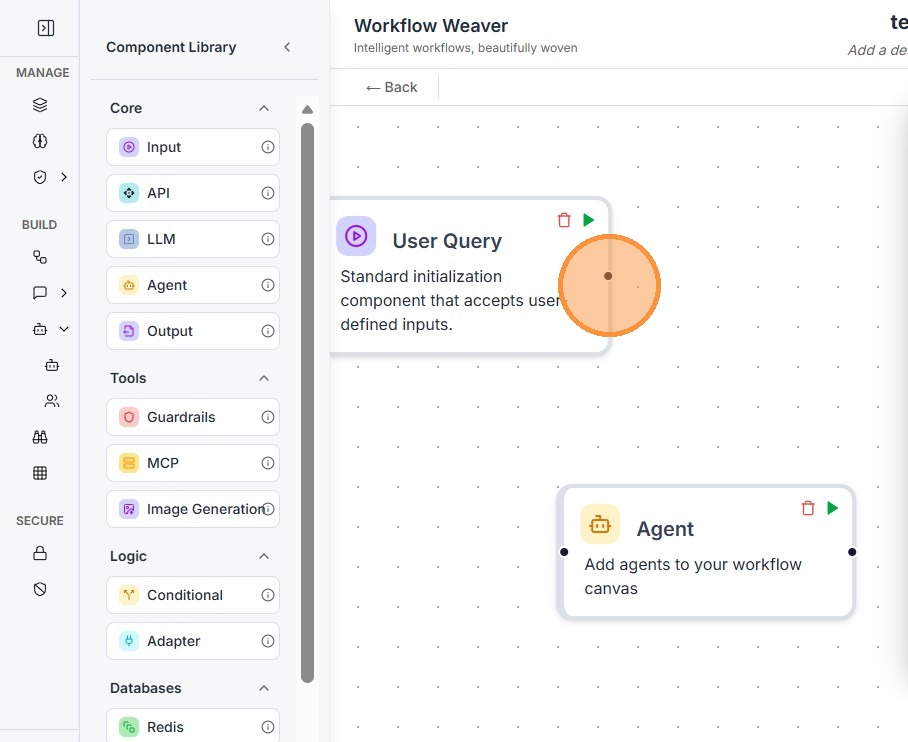
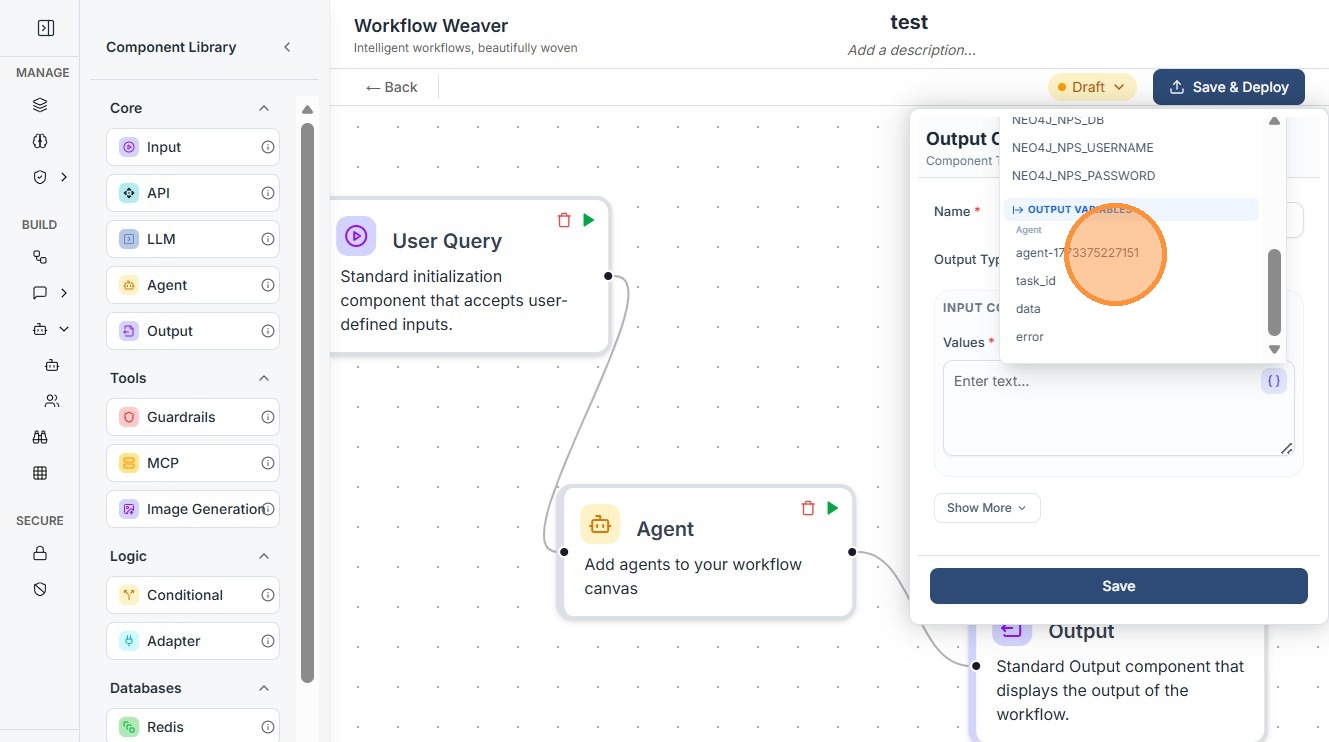
Once you connect the Nodes, your variable will appear in these options.
Click "Save"
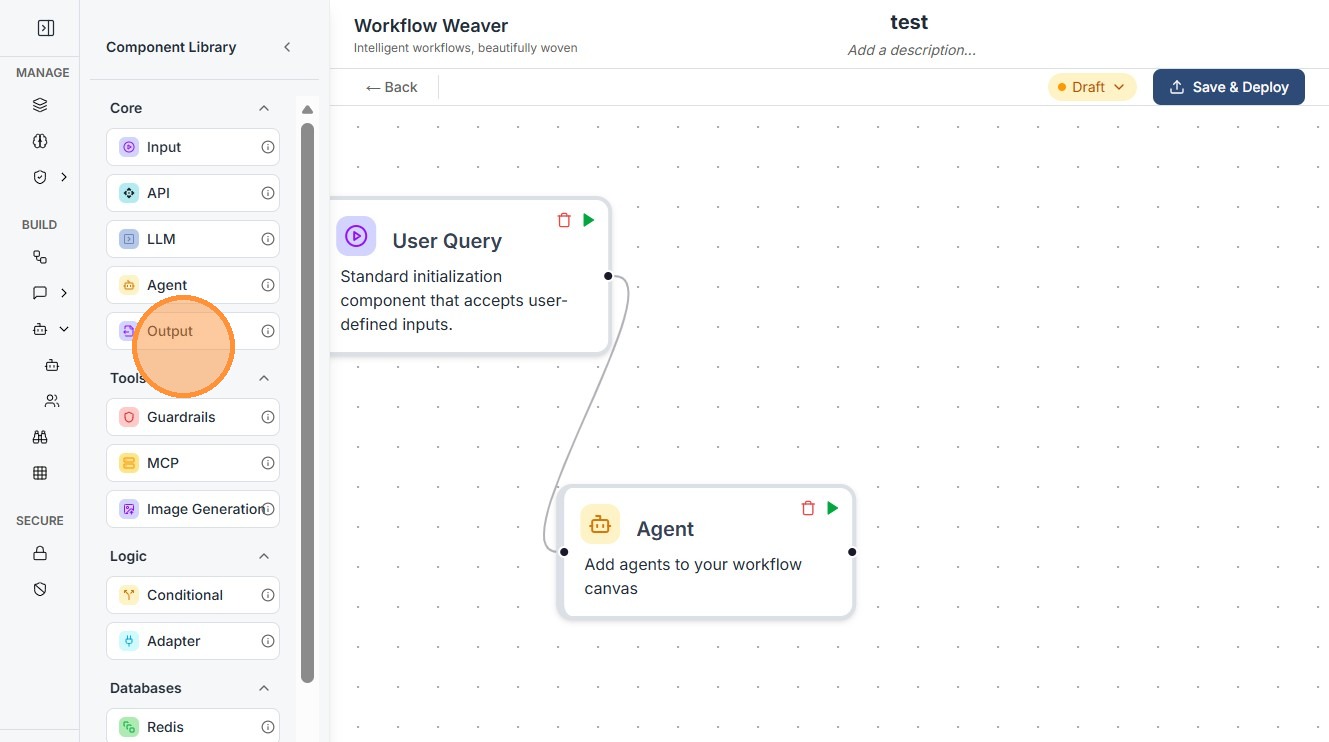
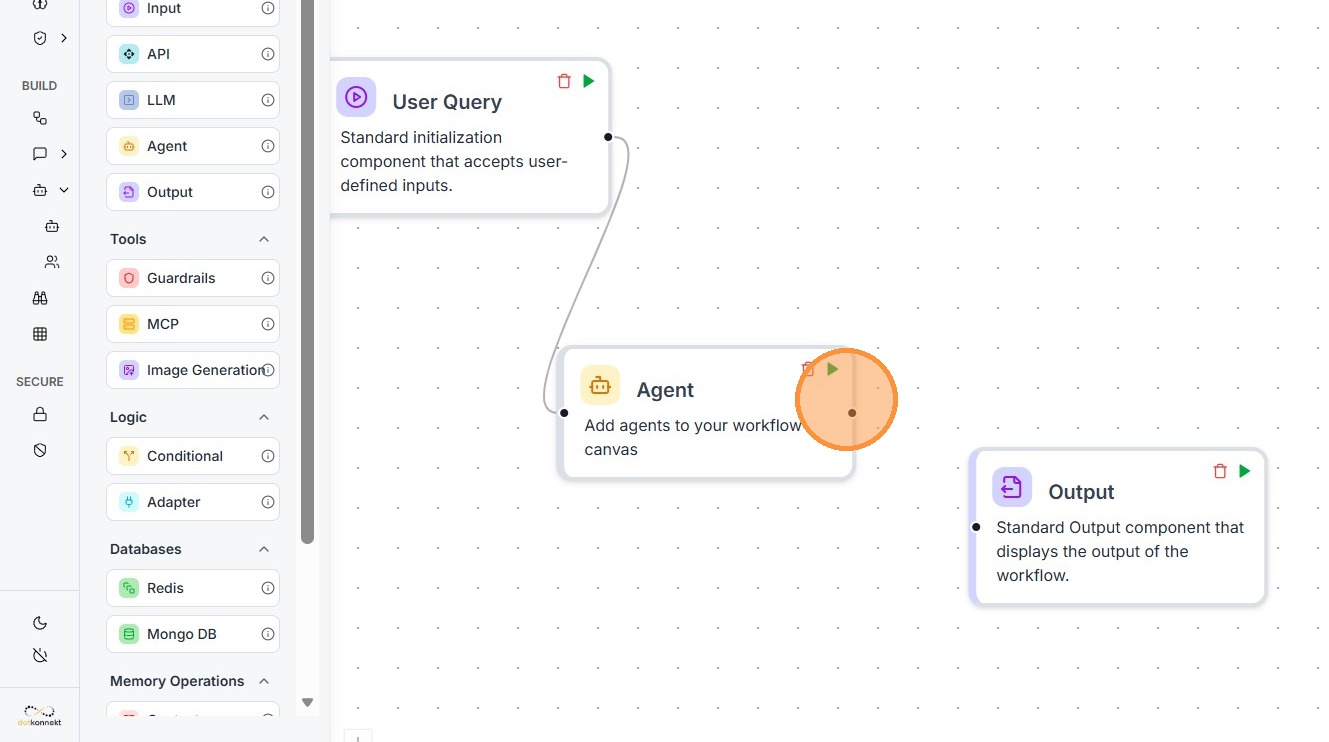
Defining the Output
To see the results of the workflow, you must terminate the flow with an output node.
-
Action: Add the Standard Output component.
-
Mapping: Link the Output node to the Agent's result. This ensures that the final text or data generated by the LLM is what the user ultimately sees.
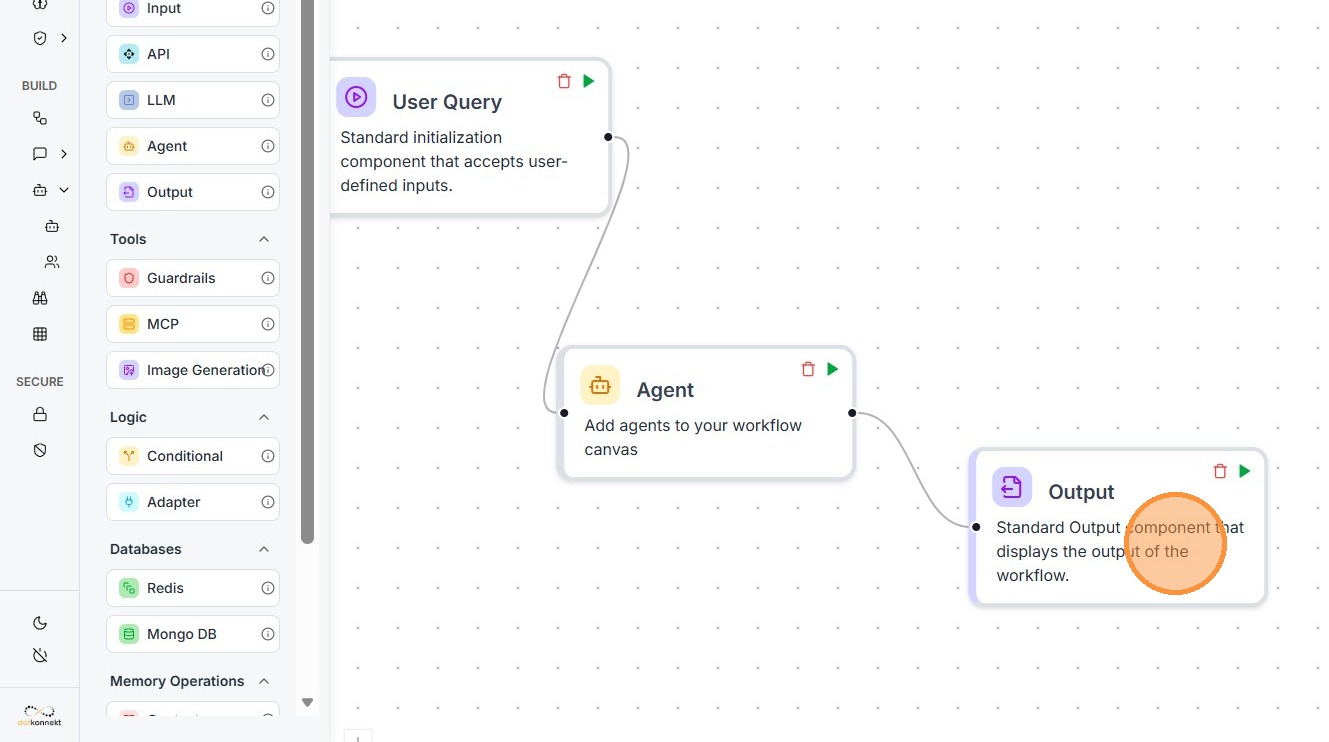
Connect the Nodes.
Click the component it will open the configuration window.
Click this icon.
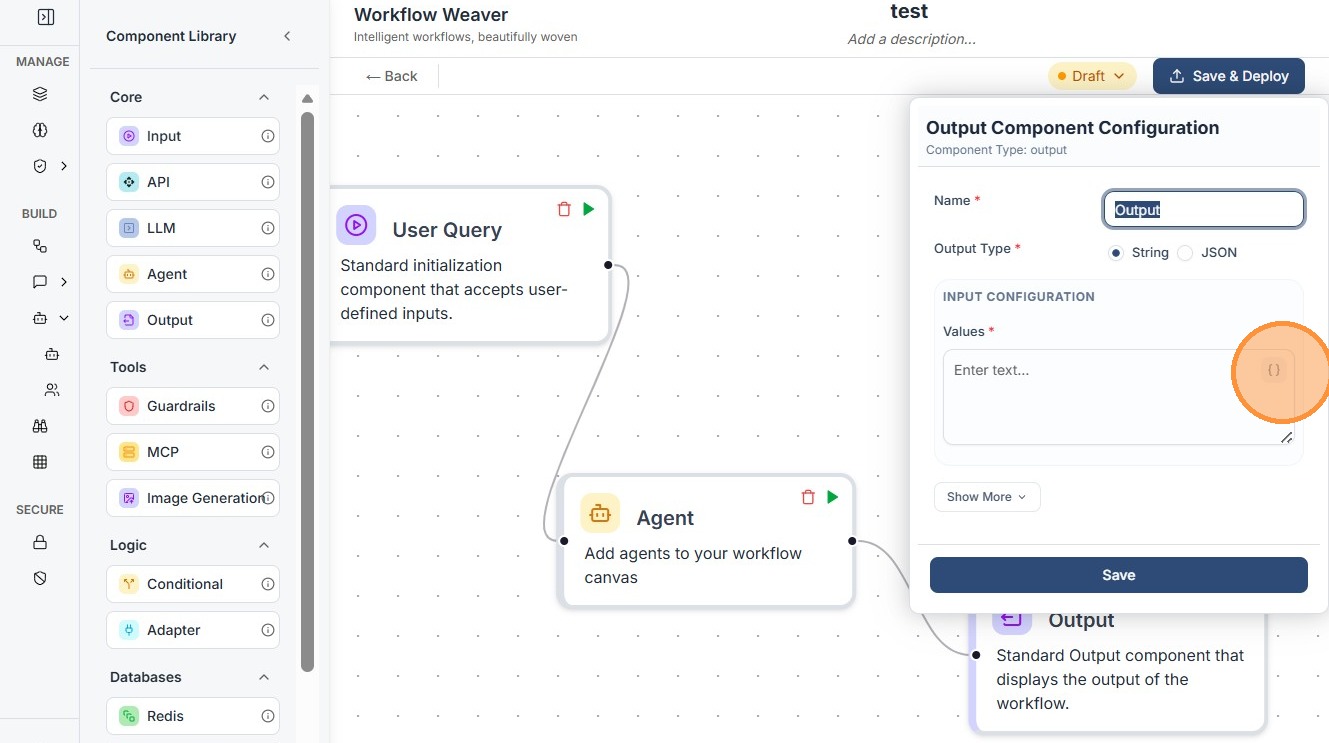
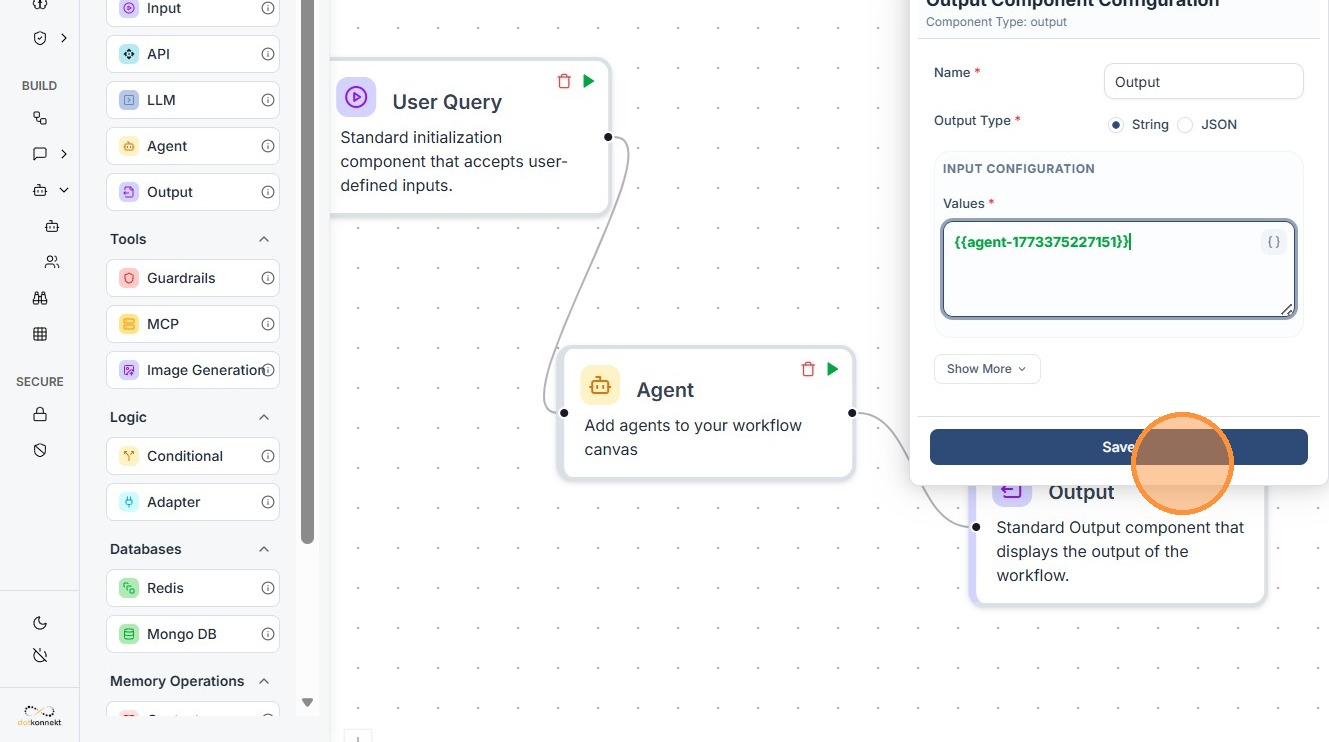
Click on the Variable you want as input to "Output" Node.
Click "Save"
Click "Save & Deploy"

Details for every component in your workspace can be found in our comprehensive documentation for each component in this guide under workflow section.