API Node
1. Component Intro: API
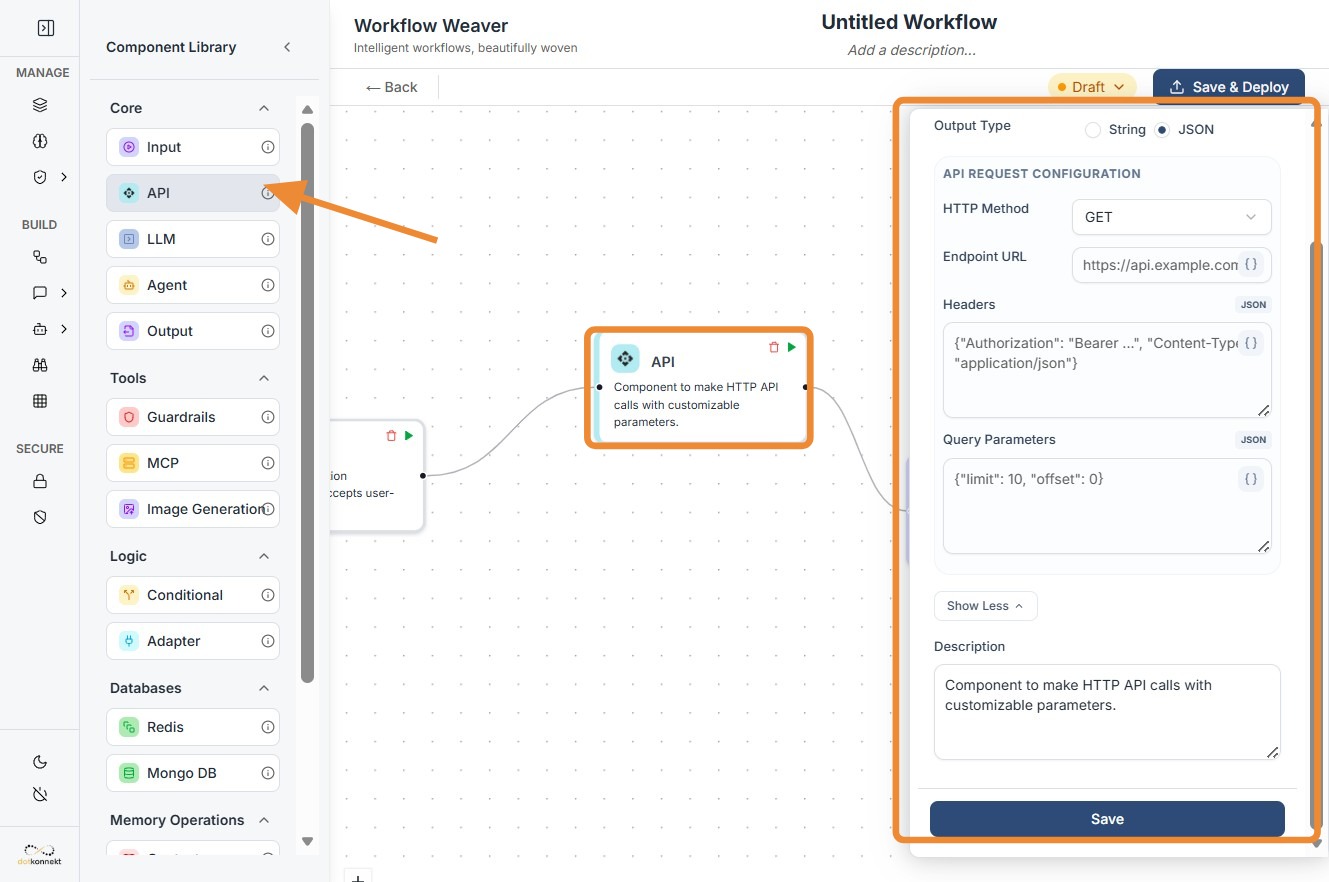
The API Component is a versatile integration tool that allows your workflow to communicate with external web services and third-party platforms. By supporting standard HTTP methods, it enables the exchange of data between the Workflow Weaver and any external RESTful interface. It acts as the primary gateway for fetching real-time data or triggering actions in outside applications.
Core JSON Structure
[[JSON]]
{
 "name": "API_Connector",
 "type": "api",
 "description": "Call an external API to fetch or send data.",
 "output_type": "json",
 "inputs": {
  "method": "POST",
  "url": "https://api.example.com/v1/action",
  "headers": {
    "Authorization": "Bearer {{vault.api_token}}",
    "Content-Type": "application/json"
  },
  "query_params": {
    "version": "latest"
  },
  "body": {
    "user_query": "{{input_node.output}}"
  }
 }
}
2. Where to Use It
-
External Data Retrieval: Fetch real-time information such as weather, stock prices, or currency exchange rates.
-
Third-Party Integrations: Send notifications via Slack/Discord, create tickets in Jira/Zendesk, or update rows in a Google Sheet.
-
Custom Microservices: Connect to your own proprietary backend services to perform business-specific logic not available within the core components.
-
Webhook Triggers: Push processed data from the workflow to an external endpoint for storage or further action.
3. How to Initialize
-
Add Node: Locate the
APIcomponent under the Core section of the library and drag it onto the canvas. -
Select Method: Choose the appropriate HTTP verb (
GET,POST,PUT,PATCH, orDELETE) from the dropdown menu. -
Define Endpoint: Enter the target URL. You can use
componentIDslike{{input.url_param}}for dynamic routing. -
Configure Parameters: * Add Headers for authentication or content-type definitions.
-
Input Query Params for filtering or specific requests.
-
Provide a Body (for POST/PUT/PATCH) to send data payloads.
-
Connect Flow: Hook the input dot to the preceding logic and the output dot to the next node (e.g., a Guardrail to scan the API response).
API Node-
Do's and Don'ts
Do's
-
Use the Vault: Always use global variables or the secret vault for API keys and tokens in the
headersto maintain security. -
Dynamic Mapping: Use
componentIDsin the URL or Body to pass data from previous steps (e.g.,{{llm_node.output}}). -
Verify Output Type: Ensure the Output Type is set to
JSONif you intend to parse specific fields from the response in downstream nodes. -
Implement Error Handling: Place a Conditional node after an API call to handle non-200 status codes or empty responses.
-
Test URL Formatting: Double-check that your URL is correctly formatted, especially when appending dynamic paths.
Don'ts
-
Hardcode Credentials: Never type sensitive API keys directly into the
headersorquery_paramsfields. -
Ignore Timeouts: Don't use the API node for extremely long-running requests (over 30 seconds) as it may cause the workflow execution to time out.
-
Send Large Payloads: Don't attempt to send massive file buffers through the standard API body; it is designed for structured JSON or text.
-
Forget Input Connections: Don't leave the input port disconnected; the API call will not trigger without an incoming signal from the flow.
-
Skip Response Validation: Don't pass raw API data directly to an Output node without first running it through a Guardrail if the data contains user-generated content.
Tip: ### Quick API Tips!
-
GET vs. POST: Use GET to retrieve data from a server (like asking for the weather) and POST to send data to a server (like submitting a form or creating a new user).
-
PUT/PATCH vs. DELETE: Use PUT or PATCH when you need to update existing information and DELETE when you want to permanently remove a record from the external system.