Mongo DB
1. Component Intro
The MongoDB Component serves as the persistent data layer for your workflows. It allows the system to interact directly with a MongoDB database to perform CRUD (Create, Read, Update, Delete) operations. This enables your AI agents and workflows to store long-term user data, fetch specific records for context, or log complex event histories in a structured, NoSQL format.
Core JSON Structure
[[JSON]]
{
 "name": "MongoDB_Node",
 "type": "mongo_db",
 "description": "Interact with MongoDB for data retrieval and storage.",
 "output_type": "json",
 "inputs": {
  "operation": "fetch_one",
  "record_id": "{{user_profile.output.id}}",
  "limit": 50,
  "connection_string": "mongodb://localhost:27017",
  "database": "users_db",
  "collection": "users"
 }
}
2. Where to Use It
-
User Profile Retrieval: Fetching a user's preferences or history to personalize an LLM's response.
-
Audit Logging: Saving the final output of a workflow or a specific reasoning step for future review.
-
Knowledge Retrieval: Querying specific collections to provide factual context to an agent.
-
State Management: Updating a record's status (e.g., "completed", "pending") as it moves through different workflow branches.
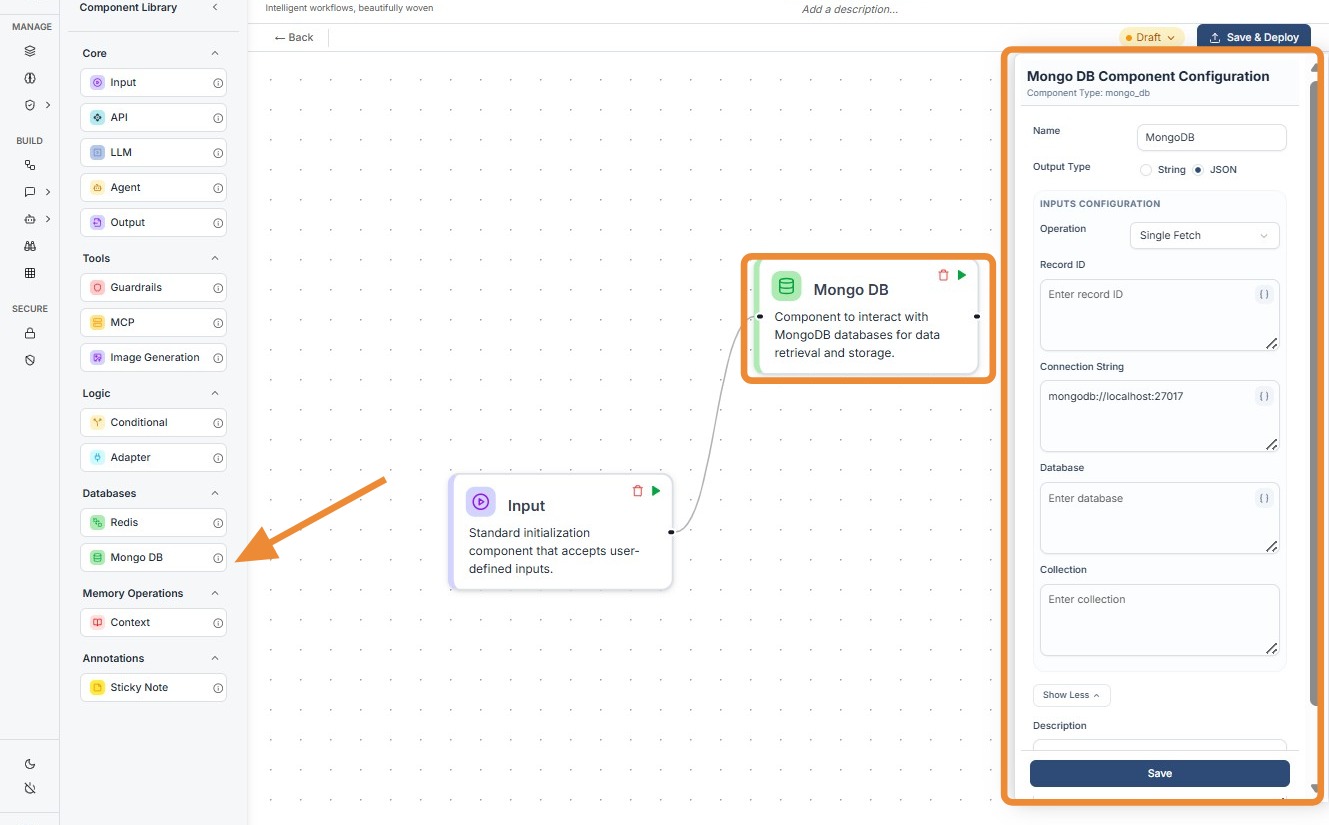
3. How to Initialize
-
Add Node: Drag the
Mongo DBcomponent from the Databases section of the library onto the canvas. -
Select Operation: Choose the desired action from the Operation dropdown (e.g., Single Fetch, Insert, Update).
-
Configure Connection: Enter your
Connection String(e.g.,mongodb://localhost:27017). While this can be dynamic, it is usually a static global value. -
Target Database & Collection: Specify the
Databasename and the specificCollectionyou wish to query. -
Map Identifiers: Use the
record_idfield to pass dynamic values using the{{componentID.output}}syntax to find specific documents. -
Connect Ports: Link the input port (left) to the trigger and the output port (right) to the next processing or display node.
Mongo DB
Do's and Don'ts
✅ Do's
-
Use the Secret Vault: Always store your
Connection String(which includes passwords) in the environment vault rather than hardcoding it. -
Limit Query Results: Use the
limitfield when fetching multiple documents to prevent overwhelming the LLM with too much data. -
Validate IDs: Ensure that the
record_idbeing passed from previous nodes is in the correct format (e.g., String vs. ObjectID). -
Index Your Collections: Ensure the fields you are querying frequently in your workflow are indexed in MongoDB to prevent timeout errors.
❌ Don'ts
-
Expose Connection Strings: Never leave raw MongoDB credentials visible in the workflow if it is being shared with unauthorized users.
-
Fetch Unnecessary Data: Avoid selecting "Fetch All" without filters; it wastes tokens and increases latency.
-
Bypass Input Connections: The node requires an input signal to execute; don't leave the input dot disconnected.
-
Ignore Error States: Don't forget to handle scenarios where a
fetch_oneoperation returns no result using a Conditional node.
Tip: Data Pre-processing
Don't send raw MongoDB documents directly to an LLM. Use an Adapter Component after the MongoDB node to strip out system fields like _id or __v. This keeps the prompt clean and saves tokens.
Troubleshooting: Connection Timeouts
If your MongoDB node is failing to connect:
- IP Whitelisting: If using MongoDB Atlas, ensure the workflow engine's IP address is whitelisted in your database settings.
- Protocol Check: Verify if your connection string requires
mongodb+srv://for cloud instances vsmongodb://for local ones. - Collection Naming: MongoDB is case-sensitive. Verify that "Users" and "users" are not being swapped in your configuration.